Social Media

Rhubarb and hazelnut mini pavlovas

21 January 2018

January in London is a funny thing. It's cold, yes - but no longer endearingly so, as it was before Christmas. Any dustings of snow are now singularly annoying, rather than festive and exciting. People are struggling along with Dry January (I'm all for heath, but forgive me for saying there is no month where I need a glass of wine in the evening more so than January), and this year, Veganuary - as someone who works in Restaurant PR, I can safely say if I never hear that word again, it will be too soon.

If I sound a little scornful, forgive me. Four years of writing a baking blog has certainly put me off this time of restraint and abstinence. Is it just me who finds this circus of resolution a little gloomy? In the throws of winter and without the holidays to look forward to, I'd prefer it if we were all a little less tough on ourselves at this time of year.

And with that, I bring you a recipe which uses sugar, dairy and majestic forced rhubarb, which is just starting to come to market ahead of its February season. Rhubarb's brightness and light is a welcome and comforting sight to this sun-lover, and the sweetness of meringue the perfect end to January resolutions.

I've written before about my struggle with winter - I come from a family of sun-lovers, and we all feel genuinely happier from May-September (it's a thing!). That being said, I find that with age the return of winter brings with it an underlying comfort and reassurance. The cosiness of nestling in for a weekend in the kitchen becomes increasingly enticing - especially on rainy days such as this. It's funny how things shift as the years go by.

What are you all baking this weekend? I'd love to hear what's going on in your kitchens. This recipe makes 4 or 5 mini pavlovas, but is easily doubled.


THE INGREDIENTS
Rhubarb
300g forced rhubarb
50g caster sugar
1 orange
1 tsp vanilla bean paste
Meringues
150g caster sugar
100g egg whites (2 large/3medium eggs)
150g double cream
1 tsp icing sugar
1 tsp vanilla bean paste
50g toasted hazelnuts, roughly chopped

THE RECIPE
Heat the oven to 160°C / 140°C fan. Line an ovenproof dish with foil. Slice the rhubarb into 4-5cm batons, trimming off the ends. Arrange in the lined dish, then sprinkle with the caster sugar, the vanilla and the juice and zest of the orange. Cover with a second sheet of foil, and roast in the oven for 20-30 minutes until the rhubarb is soft. Don't overcook it, or it will fall apart and loose its shape.


Lower the oven to 100°C / 80°C fan. Line a large baking tray with baking paper. Whisk the eggs whites to stiff peaks in a stand mixer or with an electric whisk. Add the caster sugar, one tbsp at a time, whisking after each addition before adding any more sugar. The sugar should be completely dissolved, and a little meringue rubbed between your fingers should not feel grainy.

Spoon the meringue into mini pavlovas on the baking tray. Try not to squash it, as the height is what will make them so pretty. Place on the bottom shelf of the oven. Bake for 1 hour 30 minutes - 2 hours. The meringue is done when it can be lifted off the baking paper at the edges. Turn the oven off, leaving the meringue inside to cool completely. This will allow the meringue to cool down gradually, and for the centre to become soft and mallowy.

When you are ready to assemble the pavlovas, place the cream in a large bowl. Add the icing sugar and vanilla, and whip until the cream is thick and pillowy. Spoon the cream over the pavlova, then top with the roasted rhubarb. Top with the toasted hazelnuts.

Pin ThisShare on Tumblr

Pear, dark chocolate and hazelnut crumble {gluten free}

26 February 2017

I love the ritual of baking. By that, I mean the familiar process that accompanies each new recipe.

First, the idea. Like most things in this world, the start is small. The seed could be anything - a flavour pairing seen on a dessert menu in a restaurant, a sudden craving, new season fruit at the market, or the rediscovery of a long forgotten ingredient at the back of a cupboard.

Second, the development. Armed with coffee and my kitchen notebook, I take that first inspiration and begin to imagine the bare bones of a recipe. I wonder if those flavours would work in an enriched dough? Could I candy that fruit? Which secondary flavours – sugars, spices, herbs or grains – will make this ingredient sing? And perhaps more importantly, what mood am I in? Is this a slow cook, or do I just want something quick and delicious?

Next, the first draft. With the skeleton of an idea in mind, I’ll start to think logistically. I’ll consult my own recipe archive – how much cinnamon did I add to that cake? How long did those cookies take to bake in the end? I’ll also reference my extensive collection of cookbooks, to check that my imagined ratios and timings make sense. What would Nigel Slater do? Didn’t Elizabeth David make a plum cake with hazelnuts once? And perhaps before any of this – has the wonderful Felicity Cloake already done the hard work for me?

And then, the test drive. After shopping for or gathering together my ingredients and equipment, I test the recipe. I note down any changes – that’s far too much chocolate, this oven temperature is too high – but also roll with the punches. Sometimes things don’t turn out as I’d imagined, but are even more delicious for it. Baking is a paradoxical mix of precision and flare, after all.

This recipe was one such happy accident. A mismatched and quickly ripening bowl of pears, combined with a thrown together crumble made from store cupboard ingredients.  If you don’t have pear liquer, use wine or water. I couldn’t resist a little decadence in my mid-week dessert.
pears
3 ripe conference, comice or william pears
10g butter
25g golden caster sugar
25ml pear liqeur, white wine or water
40g dark chocolate, finely chopped
crumble
40g wholemeal buckwheat flour
Pinch sea salt
½ tsp ground ginger
30g butter, cubed
20g muscavado sugar
30g rolled oats
30g hazelnuts, lightly toasted

Heat the oven to 180°C.

Peel the pears, then slice them in half and use a teaspoon to neatly scoop out the cores.

Melt the butter and golden caster sugar in a small saucepan. Once golden and dissolved, add the wine, vermouth or water and turn up the heat. Add the pears and saute. Remove as soon as they are golden and well coated in the butter and sugar. Transfer to a small ovenproof dish, pouring over any remaining cooking syrup, and allow them to cool. Scatter over the finely chopped chocolate.

For the crumble, whisk together the buckwheat flour, salt and ground ginger in a large bowl. Add the butter, and rub into the flour using your fingertips. Continue until the mixture resembles fine breadcrumbs. Stir through the muscovado sugar, oats and hazelnuts.

Sprinkle the crumble over the pears. Bake in the preheated oven for 20-25 minutes, until the crumble topping is golden and the fruit is bubbling.

Pin ThisShare on Tumblr

SALTED CARAMEL PRALINE BROWNIES

29 March 2015

If you've been reading PL for a while, you'll be no stranger to my passion for salted caramel. I'm very conscious of the cliché - salted caramel is up there with blood oranges, chia seeds, and 'slutty' bakes as overused favourites of food bloggers worldwide.

Falling prey to the clichés is easily done as a blogger. Aside from the fact that all of the above look seriously irresistible when scrolling through Instagram, there's definitely a pressure to keep up with the Jones's of the blogging world. There are so many talented, creative and smart writers out there, and it's easy to feel inferior and just a little fraudulent.

As time goes by, I'm trying to make a conscious effort not to sweat about whether my blog is as good as all the others that I love reading. Aside from the fact that it's a total waste of time, it also makes for a lot of unoriginal and clichéd writing - which is the last thing you want from a blog.

That said, there's no smoke without fire and, ultimately, trends don't tend to grow without foundation. The salted caramel revolution is a little 2013, but Pudding Lane still has a lot of time for the stuff. Throw in some toasted hazelnuts to make a praline then sandwich with layers of gooey chocolate brownie batter, and you've certainly got something trendworthy.

Of course you can save yourself a little time and buy the caramel, but it's so easy to make your own. I tend to make a big batch a keep it in the fridge for, you know, those moments when a sugar low hits.
 THE INGREDIENTS
caramel
150g caster sugar
125 ml double cream
25 g butter
1 tsp salt
75g toasted hazelnuts
brownies
150g unsalted butter
200g caster sugar
50g soft brown sugar
70g cocoa powder
2 eggs
70g flour

THE RECIPE
For the caramel, melt the caster sugar and salt in a heavy based saucepan. When it's golden brown and the sugar has just dissolved, remove it from the heat and pour in the cream. Being careful (it will bubble), beat the mixture to combine. If any lumps of sugar solidify, return the pan to a gentle heat and stir to melt through. Add the butter, stir to melt, and pour into a sterilized jar. Leave to cool. 

For the brownies, preheat the oven to 160C, and line an 8" (20cm) square tin with baking parchment. Weigh the butter, sugars and cocoa into a small pan, and melt over a gentle heat until the butter is melted and you have a combined mixture. Don't panic if it's still a little grainy.

Remove from the heat, and crack in the eggs. Beat quickly to combine - the mixture should become smooth and glossy. Sieve in the flour, and mix until  just combined. Next, pour half of the brownie mixture into your lined tin. Add a layer of caramel, ensuring you leave a few centimetres of margin around the edge. Try not to smooth it at all, as you'll end up mixing it with the brownie batter.

Scatter with the nuts, and then spoon over another thin layer of caramel. Top with the remaining brownie batter, and gently smooth into an even surface. Bake in your preheated oven for 25-30 minutes. You will be able to tell it's done when the brownie has only the slightest wobble in the middle when shaken.

Cool in the tin until just warm, then carefully lift the paper out and leave on a rake to cool completely. Slice up and share. 


Pin ThisShare on Tumblr

HONEY AND CRANBERRY NOUGAT

13 December 2014

Christmas can be an expensive time of year, especially if you have a big family (blood or urban) to buy for. Every year I put off the Christmas shop, and every year I seem to find myself hurling from shop to shop on Christmas Eve, battling past the world and his dog and whoring out my poor credit card as if money is going out of fashion.

This year, I had a stern word with myself. Lucy, you are 23 now and need to start behaving like the serene and graceful lady you aspire to be. With a bit of forward planning, it's so easy to make Christmas presents that will show your nearest and dearest just how much you love them.

Having made my own hot chocolate sticks last year, I needed something new and delicious to rustle up. Nougat is beautifully Christmassy, economical to make and keeps well for several weeks - which comes in handy in the post-Christmas glut.

So when Daelmans Stroopwafels got in touch asking me to share my favourite Christmas coffee-time treat, I couldn't think of a better recipe to post. Nougat should be soft, chewy, nutty and fruity, and that's exactly what this is.

While we're on the subject - Stroopwafels are possibly the best biscuits I have ever eaten - and I am no novice when it comes to biscuit consumption. Gone are the days of the dunker. Rest one of these little beauties atop your steaming cup of coffee (virgin or Irish, it is Christmas after all), give the heat of your drink a few minutes to soften the gooey caramel within, and prepare to be totally won over. The tins are kind of my favourite thing ever, too. If anyone is looking for something to buy me for Christmas... consider that a hint. 
I digress. For my nougat, I used hazelnuts and cranberries, but you can use whatever fillings you like. This recipe is really quite simple, but does require a little bit of planning and multi-tasking. You'll also need a sugar thermometer - they're really inexpensive and so useful, so I'd recommend investing if you're not using one already.

I'd love to hear what you're baking this Christmas - as always, you can contact me on Facebook, Twitter and Instagram.
THE INGREDIENTS 
50g cornflour
50g icing sugar
210g caster sugar
250g honey
400ml water
2 egg whites
100g hazelnuts
100g dried cranberries

THE RECIPE
Begin by mixing the cornflour and icing sugar together in a small bowl. Next, line an 8" baking dish with parchment, then dust with half of the icing sugar mixture. Set the rest aside. 

Now is the time for forward planning - don't be tempted to skip this stage. Measure the caster sugar and water into a large saucepan and place on your most powerful hob. Measure the honey into a small saucepan, and place on a second hob. Break the egg whites into the bowl of a free-standing mixer. 

Heat the caster sugar mix on a high heat, using the sugar thermometer to monitor the temperature. Once it reaches 118C, turn the heat down and move the thermometer to the honey saucepan. Bring the honey to the boil, and start beating the egg whites until the form still peaks. Keep your eye on the honey as it heats very quickly. Once it reaches 130C, remove from the heat and steadily pour into the egg whites with the mixer beating. Reduce the speed, and keep it going.

Move the thermometer back into the sugar mixture, which should have been gently bubbling while you dealt with the honey. Raise the heat to high, and when the mixture reaches 150C, add it to the egg mixture in a steady stream. Beat on high for 5 minutes, until the mixture is pale, thick and glossy.

Use a metal spoon to mix in the nuts and cranberries, then scrape the mixture into the prepared tin. Press it into an even layer (it will be sticky!) then top with the remaining icing sugar mixture. Transfer to the fridge to firm up over night.

Using a heated knife, slice the nougat into individual pieces. If you're giving the nougat as a gift, wrap the pieces with baking parchment, and fasten with string. Package up in a box, fasten with ribbon, and prepare your modest expression when everyone is raving about them.

Pin ThisShare on Tumblr

SWEET POTATO BROWNIES

30 June 2014

 I've resisted 'healthy baking' for a while now. My logic? Well, can you really blame me from questioning whether cake is really any good without butter and sugar? I've always felt that by taking away the naughty ingredients, you remove any real joy from the situation.

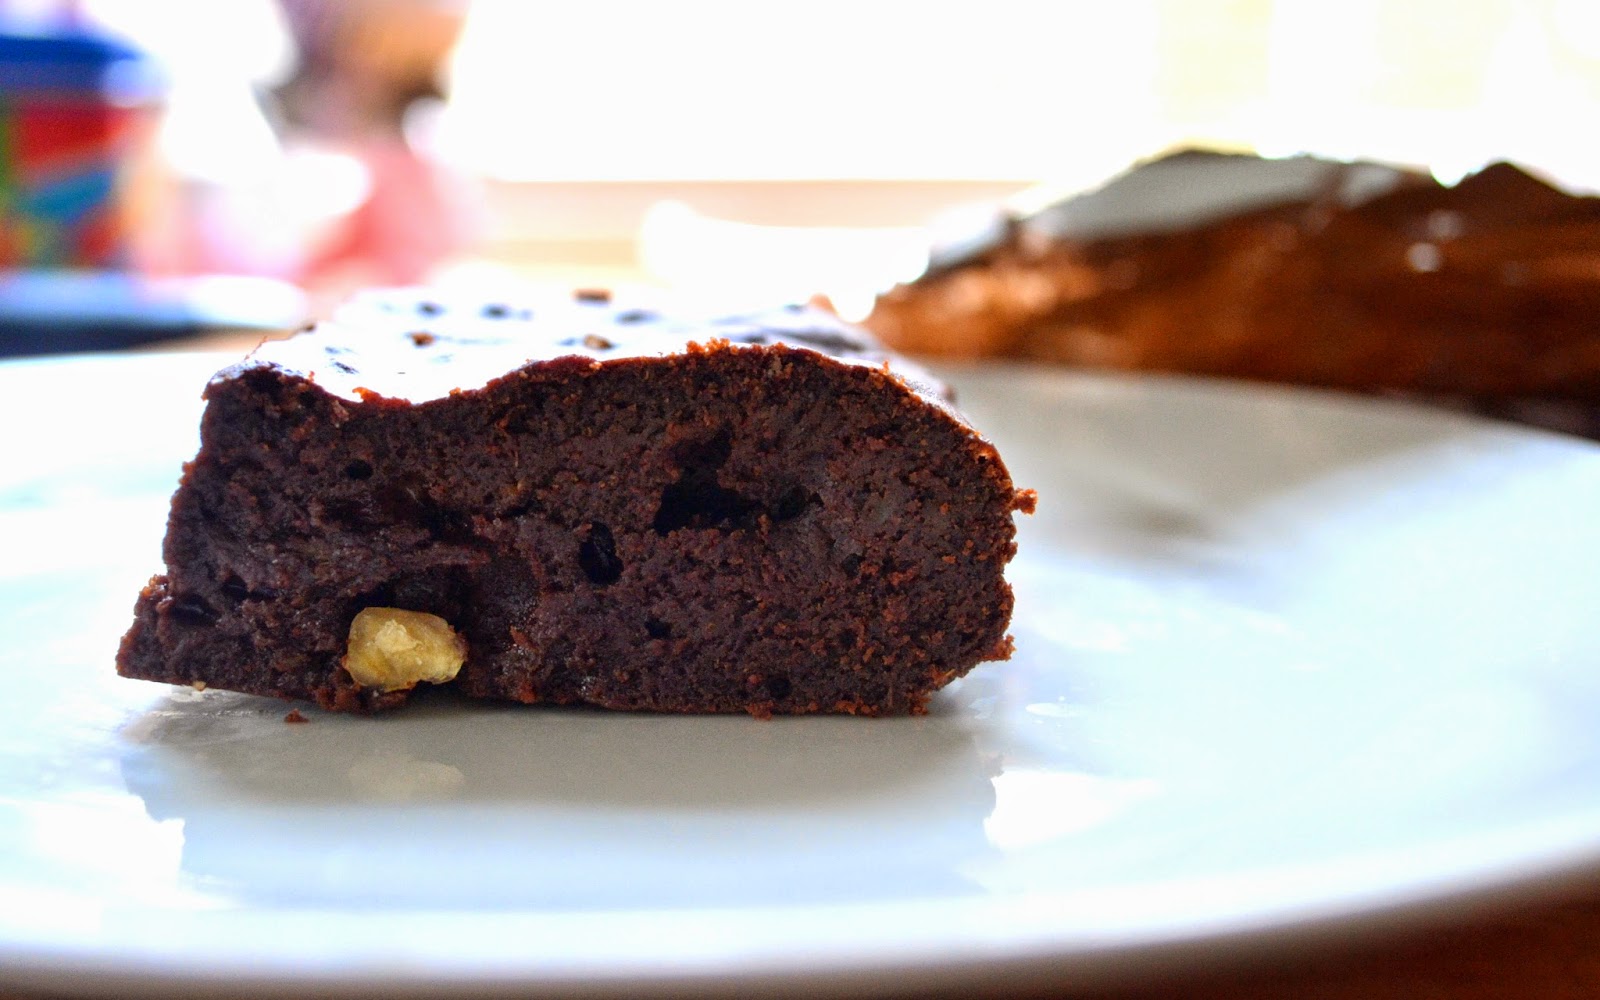
Well, I'll eat my words - once i've polished off these sweet potato brownies, that is. I still wonder whether my baking subconscious took over and snuck in a pack of butter, because these little things are moist, chocolatey and down-right deee-licious.

My little foray into health-baking has opened my eyes to the fact that it really is possible to eat healthy without losing the will to live. I'm eyeing avocados, dates and beets in a whole new light, and it seems crazy that it hadn't occurred to me to sneak veg into my diet via baked goods earlier.

Now before you start throwing in leeks and brocolli, a quick science lesson. If you're removing butter and sugar, you need to ensure that the fruit and veg you add in their place bring the moisture and sweetness which you've subbed out. Equally, if you're skimping on the bad stuff, it's worth paying a little more for really nice chocolate, as this is bringing all the flavour to the table.

And there you have it, easy as pie. And the best thing about these brownies? You would have no idea that the main ingredient is a vegetable. Scouts honour.
THE INGREDIENTS
250g sweet potato (approx. two medium spuds)
100g 90% (minimum 70, but try and get higher) dark chocolate
50g brown sugar
25g caster sugar
50g butter
100g plain flour
1/2 tsp baking powder
2 eggs
100g nuts (I used hazelnuts, but any will do beautifully)

THE RECIPE
Start by baking your sweet potatoes at 225C, and lining an 18cm square tin with foil or baking parchment. 

To prep the sweet potatoes, prick them all over and pop onto a lined tray to roast for around 45 minutes. Once they are soft to the squeeze and cooked through, remove from the oven and slice in half. Use a spoon to scoop the flesh into a bowl, discarding the skins. Use a fork to mash, then place in a mixer with the sugar, and whisk to combine. Turn the oven temperature down to 180C.

Seperately, gently melt the butter and chocolate over a medium heat. Don't let it boil. Once melted, pour into the sweet potato mix, and whisk well. Don't panic if it looks like a lumpy disaster at this point. 

Beat in the eggs, then add the flour and baking powder, stirring to combine. Finally, stir through the nuts. Pour the brownie mix into your prepped tin, then bake in the oven for 40 minutes. The brownies are cooked when the middle has only just stopped wobbling - don't overcook them, as you'll lose the gooey layer at the bottom which everyone loves.

Leave to cool completely before slicing, as you'll get a much cleaner cut if they've had a chance to firm up a little. Tuck in - and go on, have that second. You've got to get your five a day, don't you know. 


Pin ThisShare on Tumblr

MAPLE AND HAZELNUT GRANOLA

20 March 2014

Breakfast is without question my favourite meal of the day. Closely followed by afternoon tea of course.

Eggs, juices and coffee are all favourite breakfast players of mine, and there are few things that beat a leisurely brunch on a sleepy Sunday. There are also few better ways to start the day than homemade granola topped with a scoop of soy yoghurt and a handful of berries. This recipe is super easy, quick and heaps healthier than the sugary stuff off the shelf. 

You can be flexible with the quantities and throw in any nuts, seeds or dried berries that take your fancy. 
 THE INGREDIENTS
500g rolled oats
150ml maple syrup
2 tbsp sunflower oil
2 tsp vanilla extract
100g hazelnuts
100g pumpkin seeds
25g dried raspberries 

THE RECIPE
Preheat your oven to 180C and line two trays with baking parchment. Tip the oats, syrup, oil and vanilla into a large bowl. Mix with a spoon until the oats are well coated, then add the remaining ingredients. Use your hands to pulp it together a bit, and when the oats are beginning to clump together, tip onto the prepared trays.

Bake for 15-20 minutes, mixing up with a fork half way through to prevent the outsides from catching. Once the granola is golden, remove from the oven, leaving to cool and harden on the trays. Store in an airtight container, and enjoy for breakfast every morning. B.E.A-Utiful. 

Pin ThisShare on Tumblr

HOT CHOCOLATE SPOONS

9 January 2014

I am a huge fan of homemade presents. They're much nicer than anything you can buy, and are (I think) the loveliest gift to receive. And, sentimentals aside, they are a much more economically friendly way of giving someone you love something lovely.

These hot chocolate spoons are super easy to make, and make the most filthy indulgent hot chocolates. I used wooden spoons, but why not chose a beautiful teaspoon to dip in chocolate and give as a present?

You can keep it simple or adorn these with any treats you like. I dabbled with honeycomb, salt, orange essence, raspberry and hazelnuts. These work beautifully with any colour chocolate too.

16 SPOONS
THE INGREDIENTS
500g chocolate
chopped hazelnuts
freeze-dried berries
orange extract
peppermint extract
rock salt
honeycomb
caramel 

THE RECIPE
Before you start melting, make sure you prepare your moulds. I used a mini-cupcake tin, but silicon or foil cases would work well too. Break up the chocolate into a heat-proof bowl, and set over a pan of water. Bring the water to the boil, stirring the chocolate until it is melted through. 

If you're adding any essences, add a few teaspoons to taste. Pour the chocolate into your moulds, and leave to cool a little. Once the chocolate has started to set, insert the spoon into the centre. If the spoon stands unsupported, the chocolate is ready. Add spoons to the remaining moulds, and sprinkle with your chosen toppings. 

Allow to set completely, then remove from the moulds and wrap up beautifully. 


Pin ThisShare on Tumblr
 

PUDDING LANE© Theme by Blog Milk